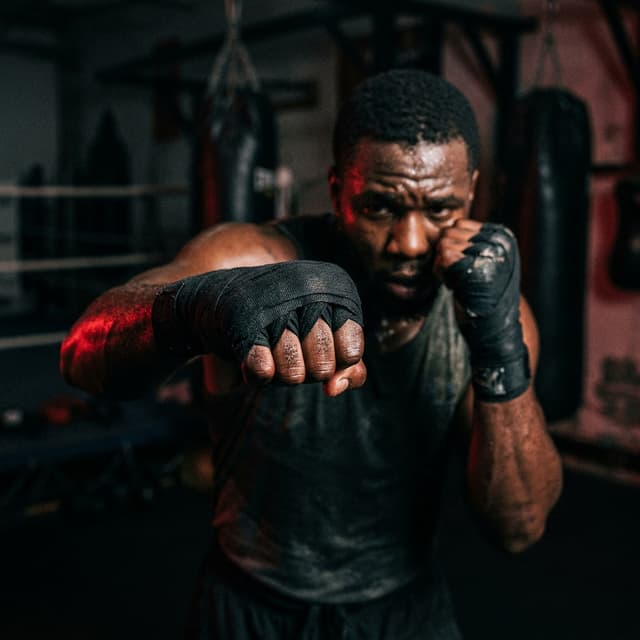
An aggressive pressure fighter wants to force you backward. They charge in straight lines, hoping to smother your punches, pin you against the ropes, and wear you down with high-volume combinations. If you try to run backward, you play into their strategy. If you stand your ground and trade power shots, you enter a high-risk brawl.
The check hook is the technical solution to this problem. It is a defensive lead hook thrown while pivoting 90 degrees out of the path of a charging opponent. The punch uses your opponent's forward momentum against them. They run directly into your fist while you slip out of danger and leave them facing the ropes.
This guide details the biomechanics, step-by-step execution, and tactical application of the check hook.
Historical Spotlight: Mayweather vs. Hatton
The most famous demonstration of the check hook in modern boxing occurred in December 2007, during the welterweight title fight between Floyd Mayweather Jr. and Ricky Hatton. Hatton was an aggressive pressure fighter who relied on high-volume infighting and forward rushes.
Throughout the early rounds, Mayweather used slips and clinches to neutralize Hatton's pressure. In the tenth round, Hatton charged forward in a straight line with his guard slightly open. Mayweather planted his lead foot, swept his rear foot clockwise by 90 degrees, and delivered a short, sharp check hook.
Hatton’s forward momentum carried him directly into the fist. The impact sent Hatton crashing headfirst into the ring post, resulting in a knockdown that ended the fight shortly after. This moment showed how a technical pivot can dismantle elite pressure.
Advanced Biomechanics and Force Physics
To throw a check hook, you must understand that your body acts as a swinging door. The punch is not an arm swing; it is a structural transfer of rotational energy.
The Kinetic Chain
- The Plant: Your lead foot (the left foot for an orthodox fighter) is the hinge. You plant the ball of this foot.
- The Sweep: You engage the gluteus medius and calf muscles of your rear leg to sweep it backward.
- The Torque: This lower-body rotation generates torque. The force travels up through your pelvis into your core muscles (specifically the obliques).
- The Transfer: The latissimus dorsi and shoulder girdle transfer this rotational velocity to the lead arm. Your arm remains rigid at a 90-degree angle to deliver the force.
The Force Vector Physics
The damage caused by a check hook is due to combined velocity vectors. If you throw a standard hook at a stationary target, the impact force ($F$) is a function of your fist's mass ($m$) and acceleration ($a$): $$F = m \times a$$
With the check hook, the target is moving toward you at velocity $v_1$, while your fist is rotating toward the target at angular velocity $v_2$. When the impact occurs, the relative collision velocity is the sum of both vectors: $$v_{collision} = v_1 + v_2$$
Because the opponent is moving forward, they cannot absorb the blow by backing away. Their skull stops instantly upon impact, while the brain continues moving forward, leading to a high probability of a knockout.
Step-by-Step: The Orthodox Check Hook
Follow this sequence to execute the check hook against an opponent charging straight at you.
1. The Trigger
Wait for the opponent to commit to their forward step. The check hook only works if the opponent has forward momentum. If they are stationary, a pivot will leave you out of range.
2. The Lead Foot Step
Take a tiny step forward and outward (to the left) with your lead (left) foot. This step places your foot outside the opponent's direct line of attack. Plant the ball of this foot firmly on the floor. Keep your knee slightly bent.
3. The Rear Foot Sweep
Lift your rear (right) foot slightly off the floor. Swing it backward and to the right in a 90-degree arc. Visualize sweeping the floor with your foot. Your hips and shoulders must turn with the sweep.
4. The Punch Delivery
As your rear foot swings, throw your lead hook.
- Keep your elbow bent at 90 degrees.
- Raise your lead shoulder to protect your chin.
- Keep your wrist straight.
- Your palm can face down or toward you. Facing down (horizontal fist) is often more effective for catching a moving head.
- Keep your rear (right) hand glued to your chin to block any counter-punches.
5. The Exit
Your rear foot lands 90 degrees to the right of your original position. You are now in a balanced boxing stance, facing the side of your opponent's head or body. Step back or launch a cross before they can turn to face you.
Tactical Applications
The check hook is a versatile weapon that changes the geometry of the ring.
Against Charging Brawlers
Aggressive fighters often drop their hands or lean forward when they charge. The check hook catches them on the side of the chin, multiplying the impact force due to their forward speed. It acts as a physical barrier that discourages them from rushing in blindly.
Escaping the Ropes and Corners
When you are trapped against the ropes, a check hook allows you to escape without running. By pivoting 90 degrees, you step off the ropes and force the opponent into the defensive position.
Southpaw Neutralization
If you are orthodox, the check hook is highly effective against southpaws. When a southpaw tries to step their lead foot outside your lead foot, throw the check hook. The pivot moves your body away from their straight left hand while your hook lands on their exposed right side.
Common Mistakes
The check hook requires precise timing. Small errors can leave you exposed to heavy counters.
- Pivoting Too Late: If you pivot after the opponent has closed the distance, you will get hit and off-balanced. You must pivot as they enter your punch range, not after they have smothered you.
- Leaning Backward: Do not lean your upper body back as you throw the hook. Keep your head over your lead foot. Leaning back takes weight off your pivot foot, making the rotation slow and unstable.
- Dropping the Rear Hand: This is the most dangerous error. If you drop your right hand as you throw the check hook, you will get hit with a counter straight right hand. Keep your rear glove pressed against your jaw.
- Over-rotating the Hook: Do not swing your arm past the target. Stop the hook at your centerline. If you swing wide, you will lose your balance and spin out of position, leaving your back exposed.
Training Drills for the Check Hook
Master the footwork first before trying to hit targets.
The Floor-Line Drill
- Draw an L-shape on the gym floor using tape.
- Stand in your boxing stance along the vertical line.
- Step your lead foot slightly to the left, then pivot your rear foot until your body aligns with the horizontal line.
- Perform this footwork twenty times in a row, focusing on speed and balance. Add the punch only when the footwork feels natural.
The Coach Rush Drill (Mitt Work)
- Have your coach hold a single mitt for a lead hook.
- The coach walks forward aggressively, trying to step through your position.
- Your goal is to pivot 90 degrees and slap the mitt with the check hook as the coach moves forward. If you get bumped by the coach, your pivot was too slow or too small.
Sparring application
- Spar with a partner who is limited to throwing straight punches while walking forward. Your only goal is to find the timing for the check hook. Focus on the moment they take their second step forward.
Summary Checklist
- Plant the lead foot as a hinge and sweep your rear foot back by 90 degrees.
- Throw the lead hook as your body rotates away from the opponent's line of attack.
- Keep your elbow bent at 90 degrees and your wrist locked.
- Keep your rear hand glued to your chin to block counters.
- Wait for the opponent to commit to their forward charge before executing.
- Do not lean back; maintain a centered posture over your lead foot.
- Stop the punch at your centerline; do not over-swing.
- Practice the footwork on taped lines to build muscle memory.
See these techniques broken down by featured creator Coach Josh.
Ready to Practice?
Put what you learned into action with a guided shadowboxing session or timed heavy bag workout.